Have a spare computer laying around that you want to use as a super cheap phone system? FreePBX is a great way to get a high quality business class phone system with little to no cost. But if you plan on connecting your new phone system to legacy trunks, like a T1/PRI, what do you need to do?
Digium T1 Card
You will most likely want to get a PCI based card to insert into an open slot in your spare computer. The other option is a digital gateway, but they tend to be very expensive. For a low cost you can get generic Digium Wildcards (they seem to be knock offs) on Ebay for around $110 US. They are finicky, so if this is for a production environment you should instead get the branded Digium cards instead. Those seem to cost $500 to $800, depending on if you get a single span with an echo canceler. If you are buying one, do get one with the canceler.
DAHDI Configuration
We are skipping setting up the entire FreePBX as there are many manuals for that already. Once you have the T1 card installed and have the system set up though, there is not much information on programming the card.
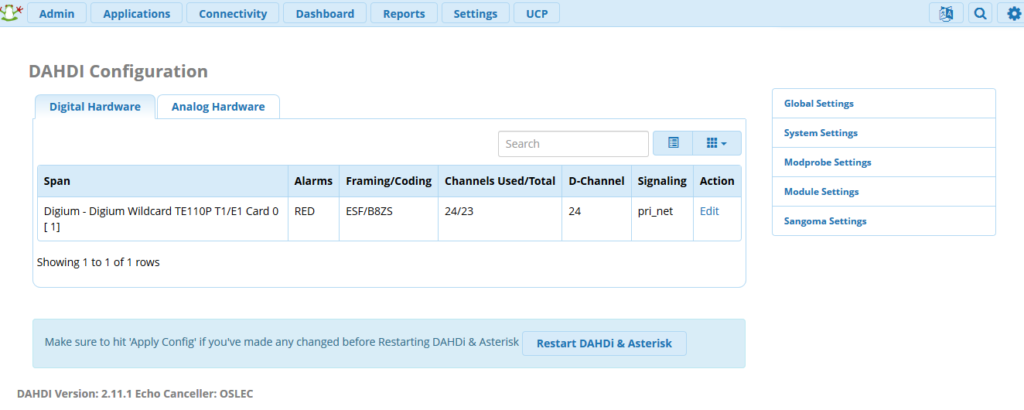
In the picture above you can see I went to Connectivity, DAHDI Config (DAHDI is the software that controls the card’s hardware). If the card was detected you should see it under digital hardware. Click the Edit selection directly under Action to enter the configuration of the card.
Digium Wildcard Configuration
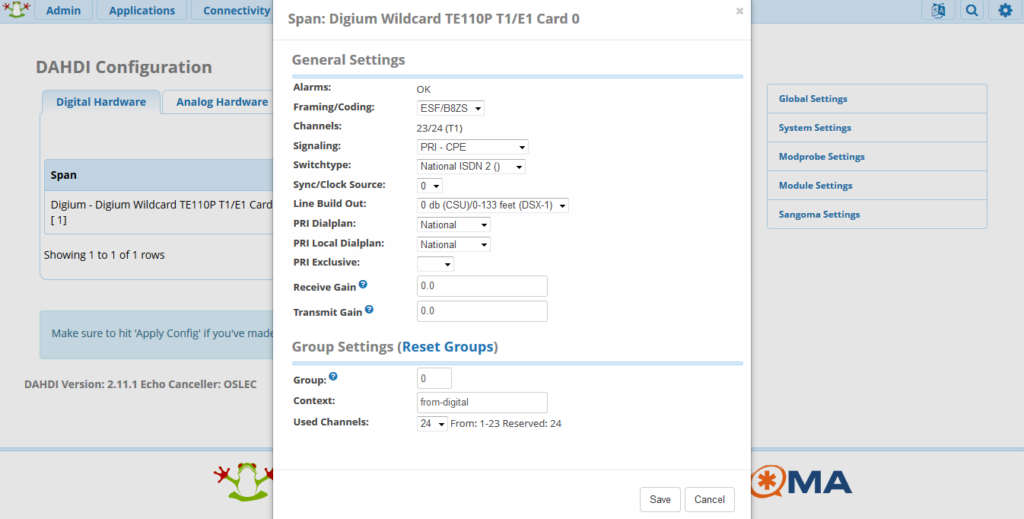
Here is where you set up the framing, signaling and switchtype. I’ll be using standard US options with ESF/B8ZS framing, PRI signalling and NI2 switchtype. If you don’t know what settings you need be sure to ask your provider for details, but in the US at least, the above settings are the standard.
One thing I noticed that may have to do with using the generic Digium card is that it was always changing the signalling from PRI-NET to PRI-CPE. When I was trying to get this to work it would seem to change at random. Either way make your setting changes and click the save button on the bottom right. Then at the top right you will get a red “Apply Config” that you need to click. The FreePBX should do a pop up to remind you to press the “Restart DAHDI & Asterisk” button at the bottom of the DAHDI Config page.
Another note is that the DAHDI would sometimes not come back up after pressing the restart DAHDI button, again possibly due to the card. It seemed that if I left the T1 wire unplugged from the card it had a better chance of coming up with no issues.
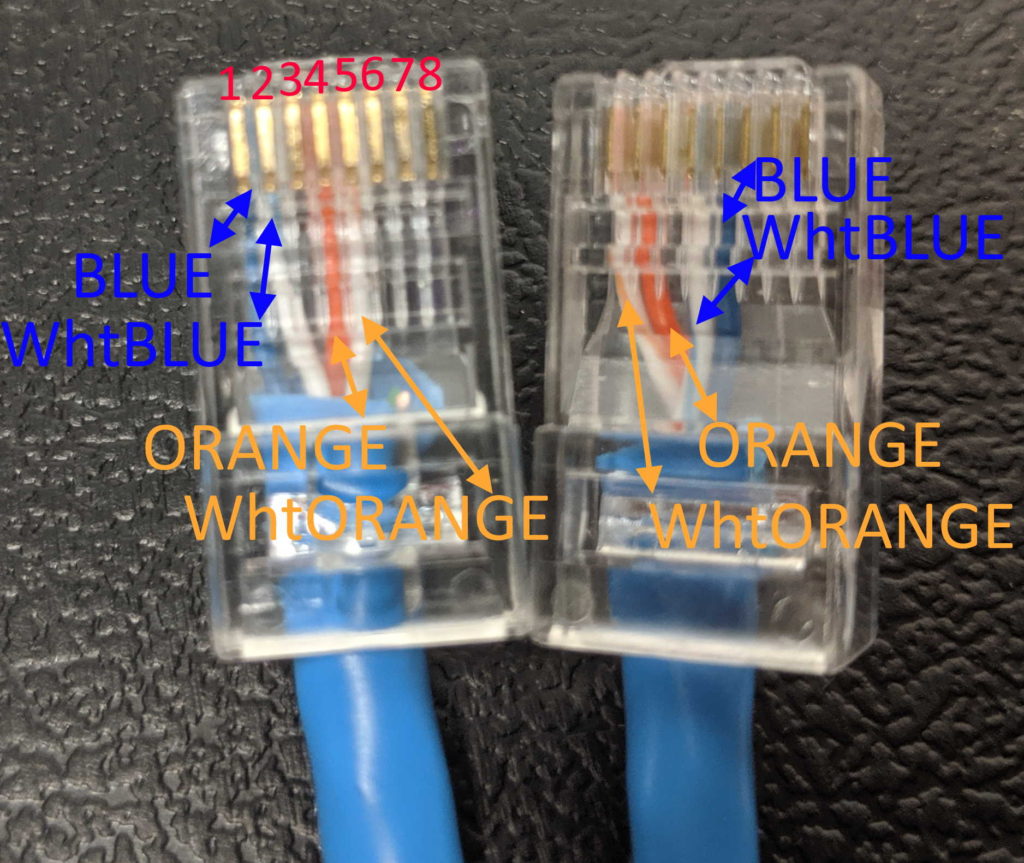
For this to work with a T1/PRI I had to use a T1 crossover cable. I was testing it by connecting it to other phone systems though, so if you are plugging into a Telco smart jack you could possibly just use a straight through network cable. Look at the picture below for a hand made T1 crossover cable.
Once you have the card programmed and have restarted DAHDI, the light on the card should go from red to green when you plug it into a signalling source, like a properly configured phone system or the telephone companies smart jack.
Trunk Configuration
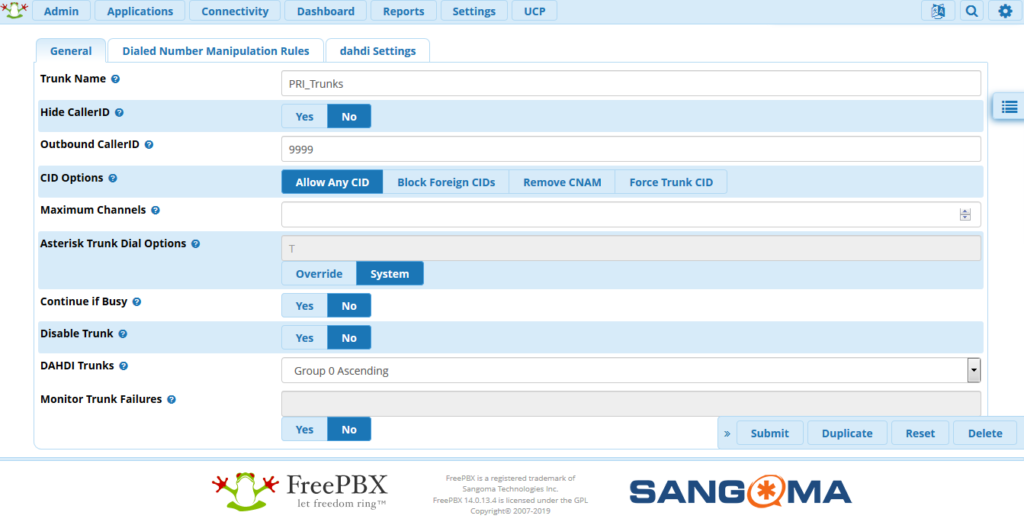
I am leaving out some details like inbound routes. I found just making a generic inbound route with no DID assigned (it will show up as “Any”) calls into the digital circuit came in fine. But I had issues with outgoing so check out the picture below to see the setting I had to change to get it to work. Under Trunks I had to select Group 0 Ascending. Group 0 should be the default the system creates when you install the card. It includes all of the trunks (23 for T1/PRI). When this was set wrong I would just get constant ringing when calling out, and the call did not seem to leave the system.
Once you have this trunk group set up you can add it to outgoing routes.