
The Grandstream UCM is very flexible to program for simple day and night mode switching. It also does automatic switching with time and holiday settings with a very intuitive GUI. In this post I will describe setting inbound trunks for manual day and night switching with a button on a phone and also automatic switching with office time and holiday settings.
Manual Day Night Mode
This way of setting up inbound routes is probably most familiar to customers coming from an old phone system. Someone at the office has a button on the phone they press to switch from day to night mode. It’s fast and easy and works great until someone forgets to hit the button.
First thing we do is go to Inbound Routes and select the blue box with “Set Global Inbound Mode” at the top of the screen. This takes us to the place where we turn the feature on, set the default, set the feature codes for switching, and set the BLF extension for the phone.
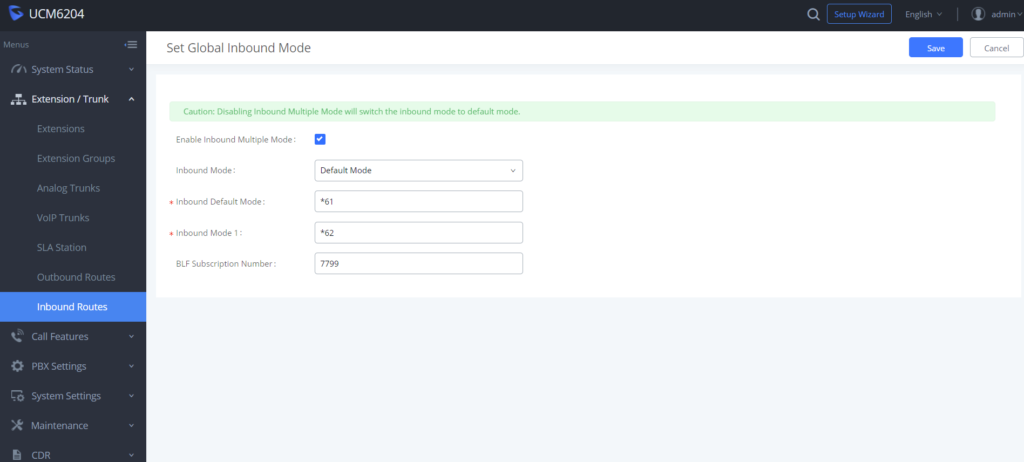
Enable the multiple mode by putting a check mark in Enable Inbound Multiple Mode. You can leave your Inbound Mode at default. Then enter your star feature codes for switching between the two modes. Finally enter an unused extension number that will be your BLF on the phone that changes the mode.
When done be sure to click Save at the top right of the screen and then on the next screen to click the blue box with Apply Changes in it! Do this after every change or else the settings are not saved or applied!
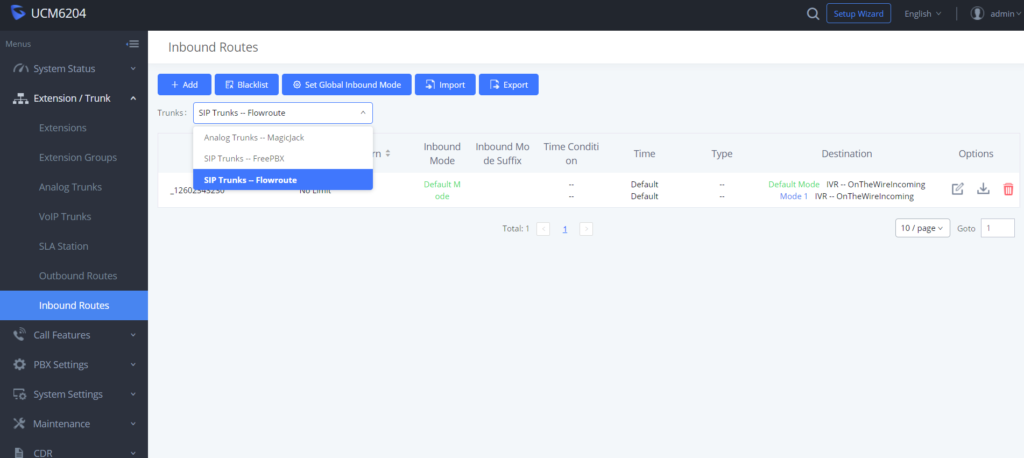
After turning on the multiple mode we will go to the inbound route we want to change. One tricky thing with Grandstream is when you go to the Inbound Route page it will only show the first route you have and you have to hit the drop down to see the rest. Many times I found myself making changes to a route that I did not mean to change, so pay attention to what route you are on!
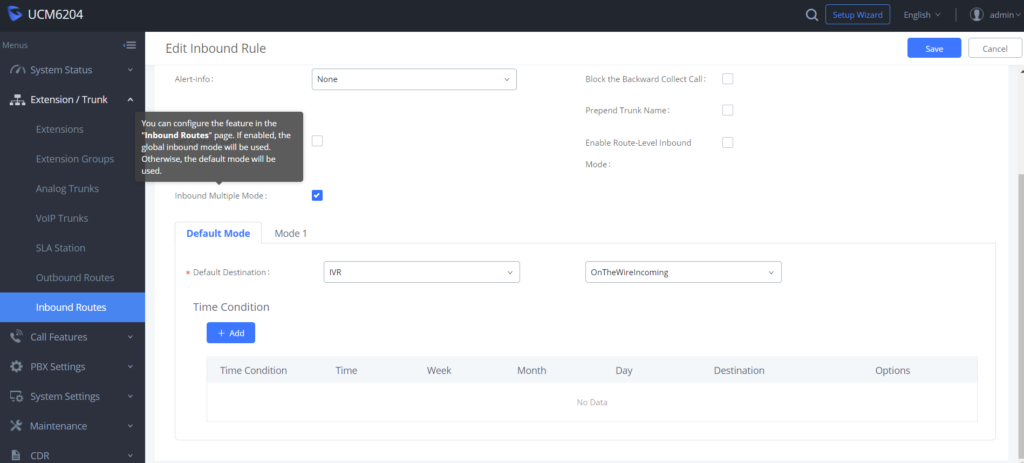
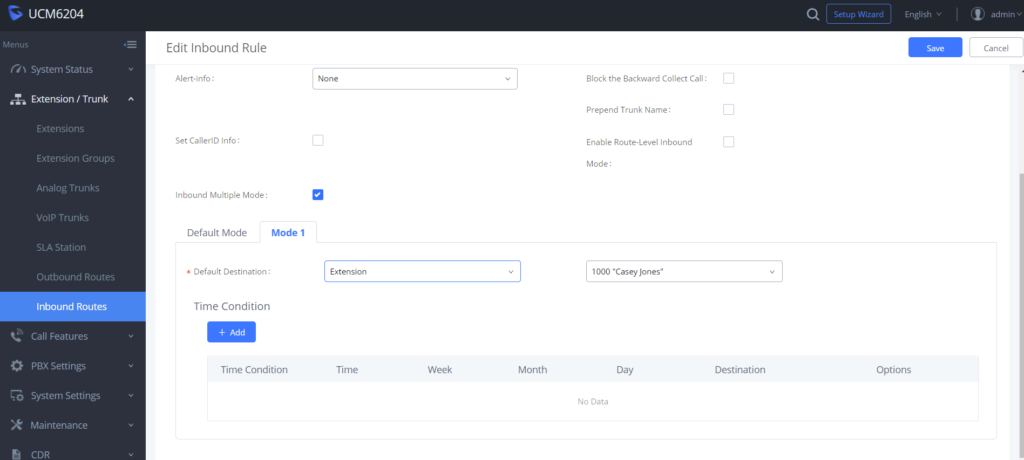
Once you have the route you want to edit on the screen hit the edit key just under options. Now you check the box for Inbound Multiple Mode on the actual route. Set up your default “Day” mode to go where you want during the day. Mode 1 will be where you want calls to go during “Night Mode”. Again be sure to click the blue save button on the top right then apply changes.
With these setting saved and the configuration applied you can dial the star feature code you programmed earlier to put the system into the different modes. But easier than that is just adding a BLF key to the main phone with the extension you entered before. With that BLF key you just press it and it flips between the two modes with default “Day” mode showing a green key and mode 1 “Night” showing red. Please note that with my current system there seems to be a bug where pressing this mode switching key says “Invalid route”, but the switching works correctly.
Automatic Switching with Office and Holiday Time
For companies with very well defined hours like banks having to change day and night by hand is too much work and too error prone. Instead how about putting in your hours and the holidays and let the system send the calls based on the time and date?
Just like manual you can turn on the Global Inbound Route, but you don’t need to do that for simple automatic switching. Not to get too far in the weeds, but you could turn on multiple inbound routes and during the default mode go to certain places based on the time and date, and do other separate destinations based on the time and date with the system in mode 1. For this example I’ll keep it simple and just use one inbound with time conditions.
Before using time and date switching remember that the time and date must be correct on the Grandstream. Go to Time Settings, NTP and make sure you have your correct time zone selected and the NTP server is being polled by your system.
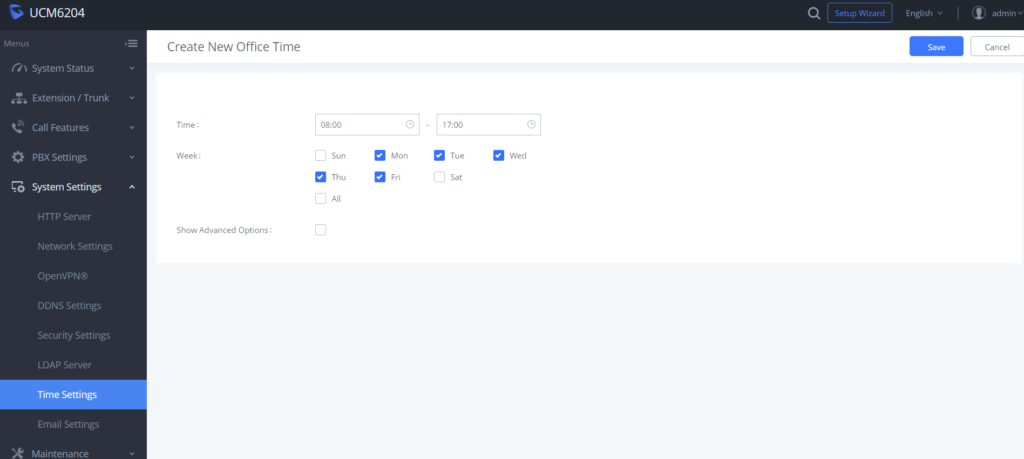
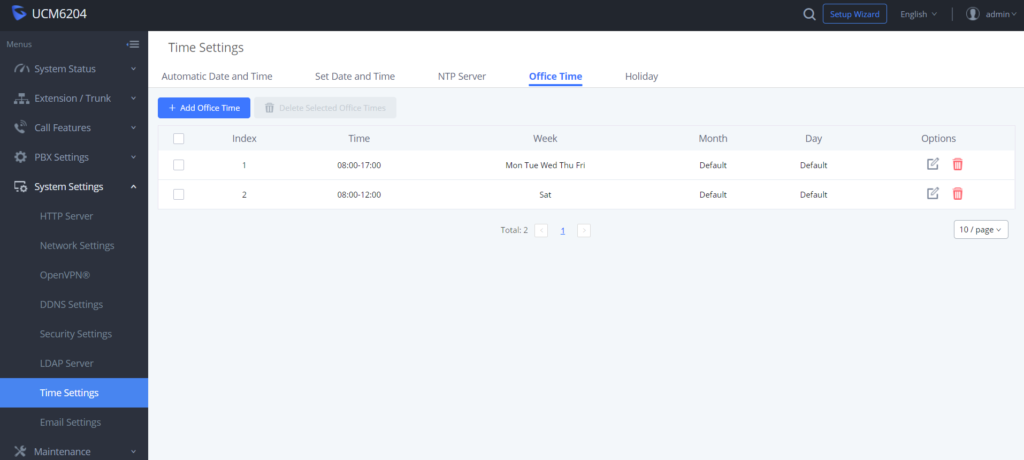
Start by setting your Office Time. If you have a bank of days with the same hours you can do them all at once. If you have a day with different hours, like a Saturday, you create that office time separately.
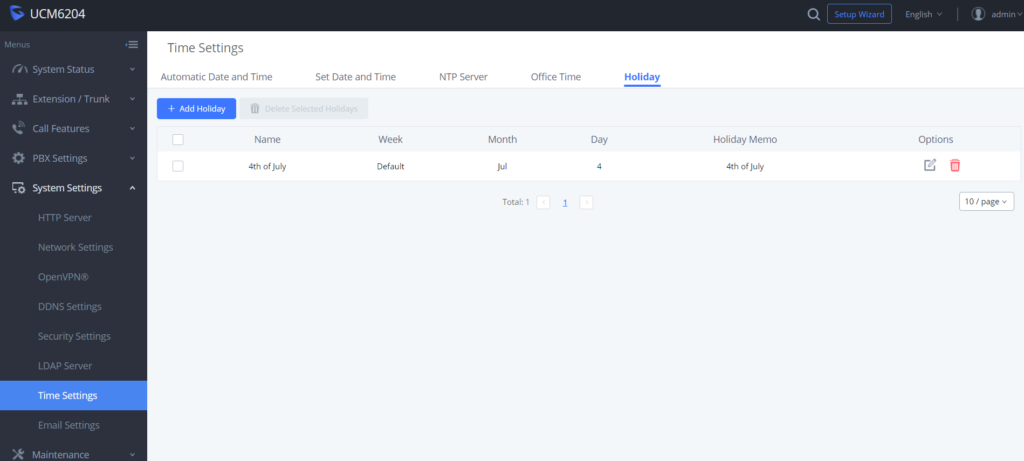
You can also set holidays so that when you are not in the office for the holiday calls are handled correctly.
Remember to click the blue Save key at the top right of the screen and the blue Apply Changes button after you save!
With the office time and holidays configured we can apply them to the route. Go to the inbound route (be sure to hit the drop down and select the correct route!) and hit the edit key. Now you set up your default destination as your “Day” mode and you put in the time condition of Out of Office Time or Holiday destination as your “Night” mode.
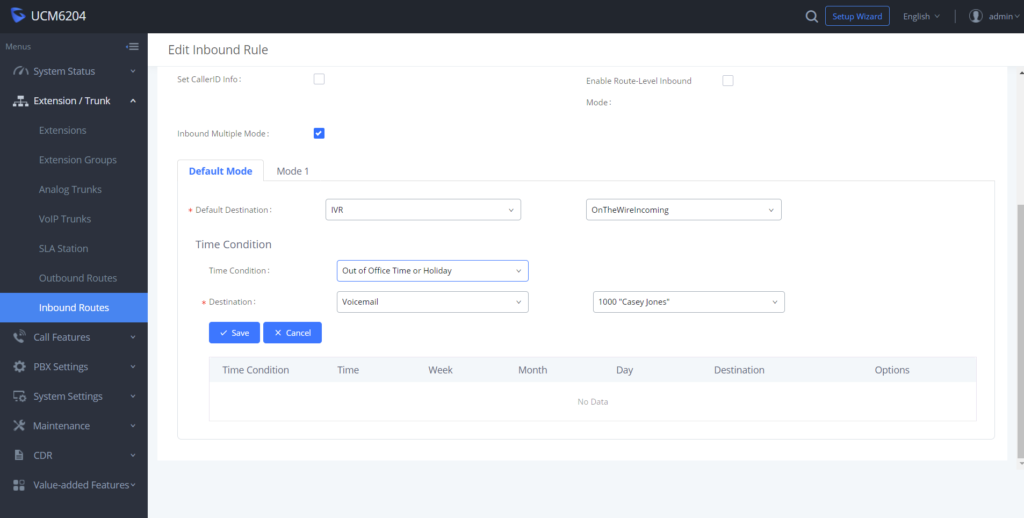
In this way if your system time matches your office time the system sends calls to the default destination, and when the time doesn’t match or it is a holiday, it goes to the time condition destination. Notice you could also do this as the inverse and make your default destination your “Night” mode and set the time condition to Office Time or Holiday instead of Out Of Office and then that would be your “Day” mode. This is very similar to how we set up Inter-tel STAR programming.